
Case Study: Engagement Ring Remodel
- Kate Seow

- Apr 2
- 4 min read
It's not unusual for engagement rings to show a little wear-and-tear after 25 years of marriage, but for one of my clients, the delicate design of her ring meant that she would need quite a bit of repair-work to restore it to its original splendour. After approaching a number of high street jewellers only to be told that "it's not worth repairing, but we can help you find a new one", she came to me in the hope of remodelling it. She also brought her late mother's engagement ring with the idea of combining the two rings into one. Here is the story of that transformation.
The first step in this remodel was to come up with a few design ideas based on the materials I would be working with. As I don't take apart any jewellery until my client and I have agreed on the final design and cost, this stage can involve some guess work as gemstones can't accurately be measured whilst in their settings and metal must be weighed with the gemstones included. Whilst these are minor inaccuracies, it is important to factor in some wriggle room to ensure the design can still be achieved once the exact weight and dimensions of the materials are known. In this case, we realised that more gold would be required for the settings. Fortunately, my client was able to supply another dress ring.
After providing pencil sketches of a number of possible designs, my client decided on one, and in this case, I provided her with coloured pencil renderings of her chosen design in three views: two from each side and one top view.

Once the design and costs were finalised and the deposit paid, I started work on remodelling the rings: the stones were removed, cleaned and kept safe and the gold was melted down into a little ingot. This ingot was then rolled into thick square wire before it was divided into thinner square wire for the ring shank and a thin strip to create the settings for the gemstones.


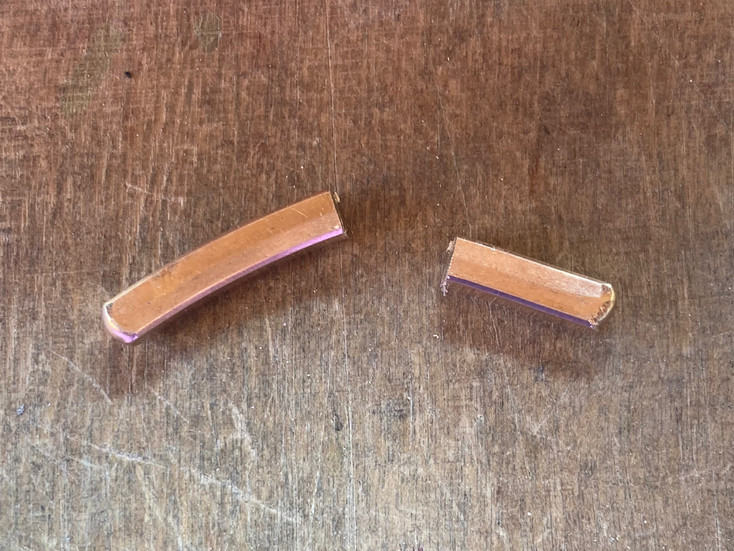
This melting and rolling process is time consuming, especially with alloys such as 9ct gold where the additional metals that make up the alloy can make the gold difficult to work with. Whenever metal such as gold and silver is rolled, forged (shaped with a hammer) or drawn (pulled through increasingly smaller holes to form a wire), the metal must be regularly heated to a dull glow to allow the metal structure to relax - a process called annealing. Without this, the metal would become too hard and brittle to work. In general, the lower the purity of the metal, the more prone it is to becoming brittle and cracking, and it takes knowledge and experience to know when and how to anneal each alloy.
With the gold now formed into sheet and wire that I could work with, it was time to make the gemstone settings and shape the ring band. One of my favourite styles of gemstone setting is the collet setting, where the metal completely surround the gemstone: this style of setting is less likely to get caught on clothing and protects the gemstone. The collet is made up of an outer wall that the gemstone should fit perfectly inside and an inner seat that supports the gemstone. For the two larger diamonds, I created two large granules (melted balls) in which I flush set the stones. Once I had created the gemstone settings, I soldered them together, then shaped the ring shank so that it would support the settings effectively.


After all the soldering was complete, it was time to file, sand and polish the ring prior to setting the gemstones - this is another long process, but well worth taking the time to get right. Before setting the stones, the ring was sent to Sheffield Assay Office for testing and hallmarking. Upon arriving back with me, it was time for the final step - setting the stones and getting a final polish. I set the four central stones by cutting metal away to refine the seats for the stones, then pushing the walls of the metal over the stone to capture it in place. The pavé-set stones along the arms of the ring shank is a complex technique that I am still learning at the time of writing, so I asked a more experienced colleague to set these for me (many thanks to The Diamond Setter for this).
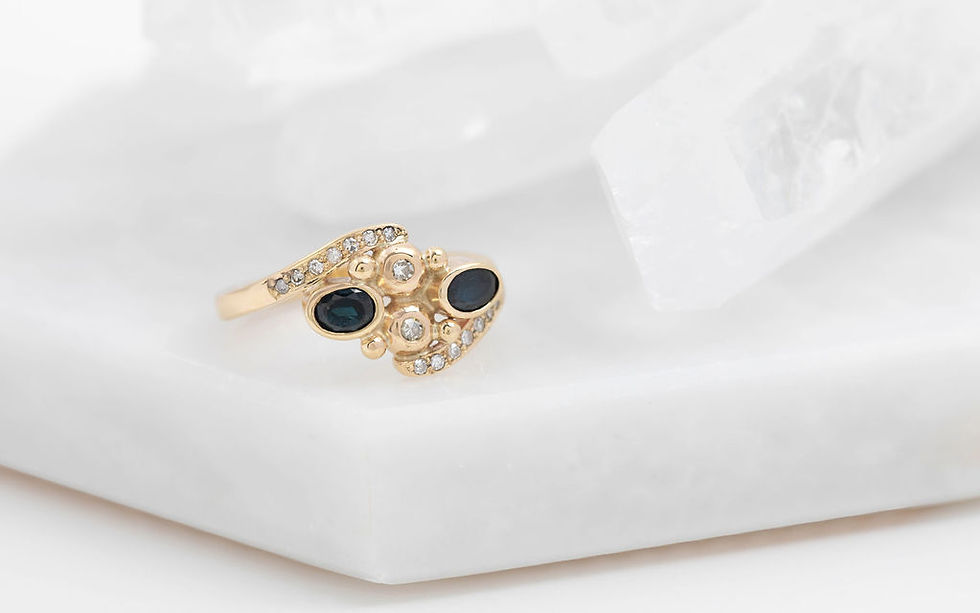
My client was over the moon to have both her and her mother's engagement rings combined into one in a new and unique setting that will stand the test of time. Having seen her on a number of occasions since I made this for her, I know that she rarely takes it off!
If this story has inspired you and you wish to talk about your own remodelling project, feel free to email me at kate@kateseowjewellery.co.uk to start the conversation.
Until next time, stay sparkly!
Kate xxx


Comments